How to Add Connectors
The connector is a component that allows you to stream channels from a service provider. To access their content, registering your connector with the respective service provider is necessary.
Sample Chart of Connector:
Before adding a new Connector to your BMX profile, you need to make some changes to your NXT panel, if
Steps for adding a New Connector
To create a new Connector, the main things you need are Platform Token and Private Keys, which you can get from the user/reseller section on your NXT panel.
And to get the Platform Token and Private Keys, you need a reseller/admin account from your NXT which will include Packages information as well.
We assume you already have certain packages and crediting systems assigned to your Reseller/User account, in that case, you can just obtain the Platform Token and PV keys by clicking on the (BMX) button beside your user list.
If in any case you are a new NXT user or you want to separate the reseller/user account to be associated with BMX. You might want to start fresh by creating Bouquets > Packages including Crediting System > Assignment.
Skip this part if you are using your existing User/Reseller account from NXT.
Creating a Bouquet
1. Go to the Bouquets section on your NXT panel. Click on Create Bouquet.
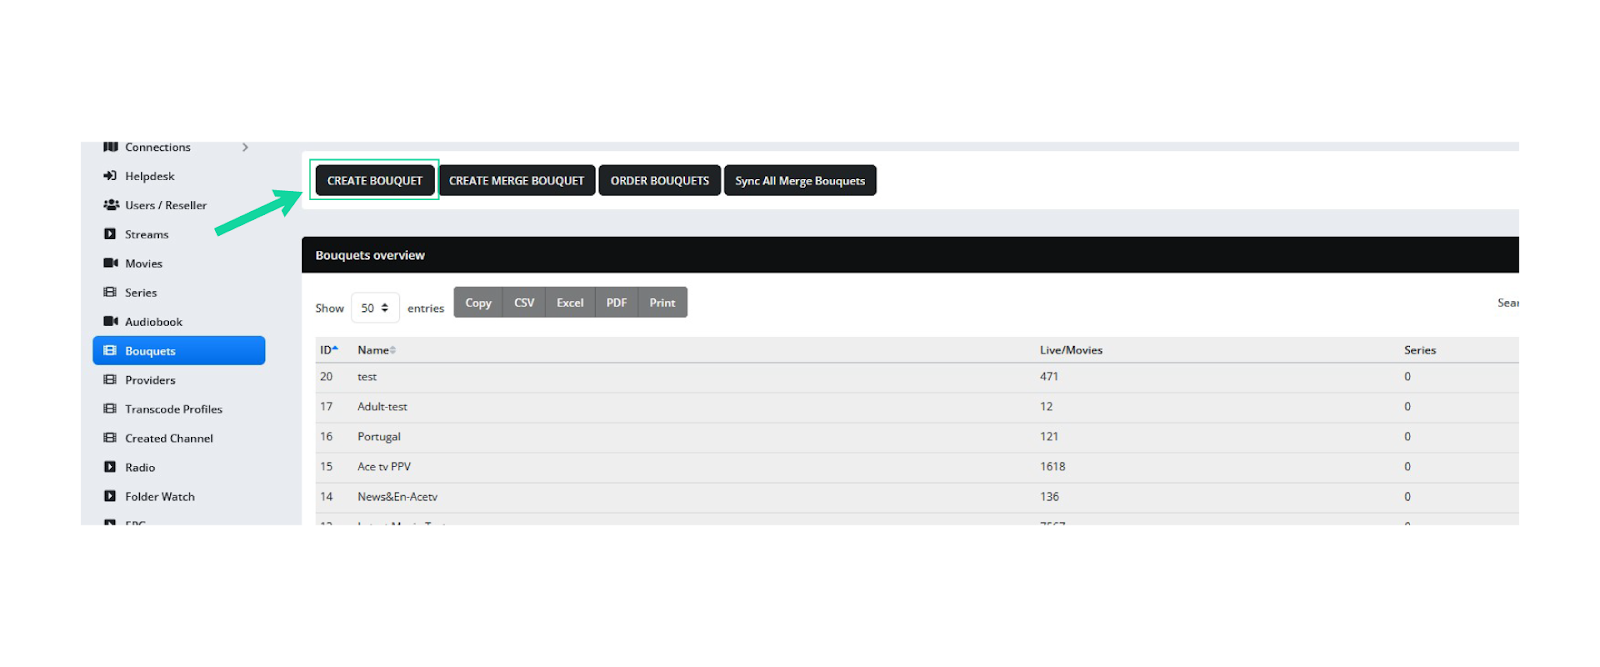
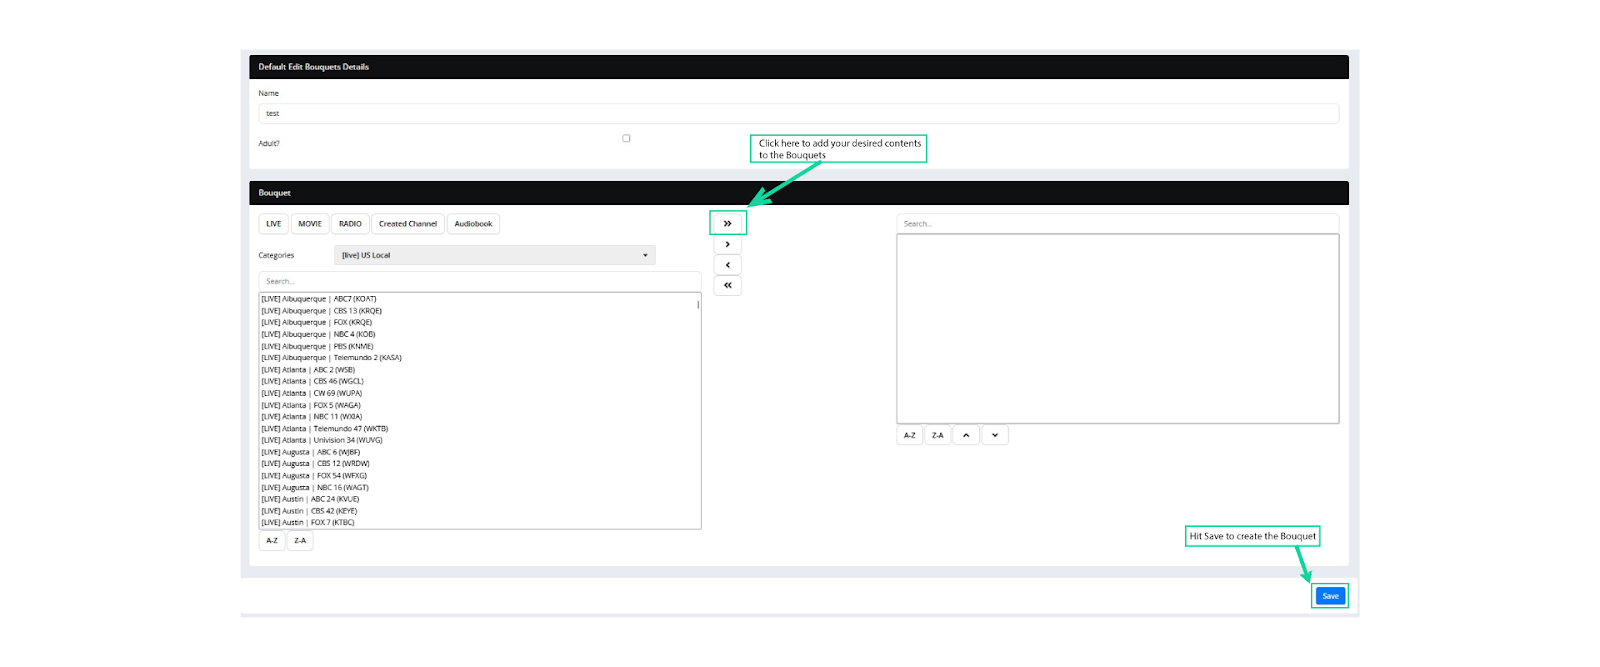
2. After that you need to select the contents that you want on this new Bouquet. Simply select the content that you want, for example, we are adding Live TV content. So click on LIVE and select the Category, then pass all the contents from left to right by clicking the double arrow (>>) option. Then hit save.
Note: If you want to create a series Bouquet, then after creating a Bouquet, don’t add any content, just go to the main page of the Bouquets section and Select the Edit series button from the Action menu at the right.
Now that we created a Bouquet, let’s proceed to Packages.
Create a Package
1. Go to the Packages section and click on Create Package.
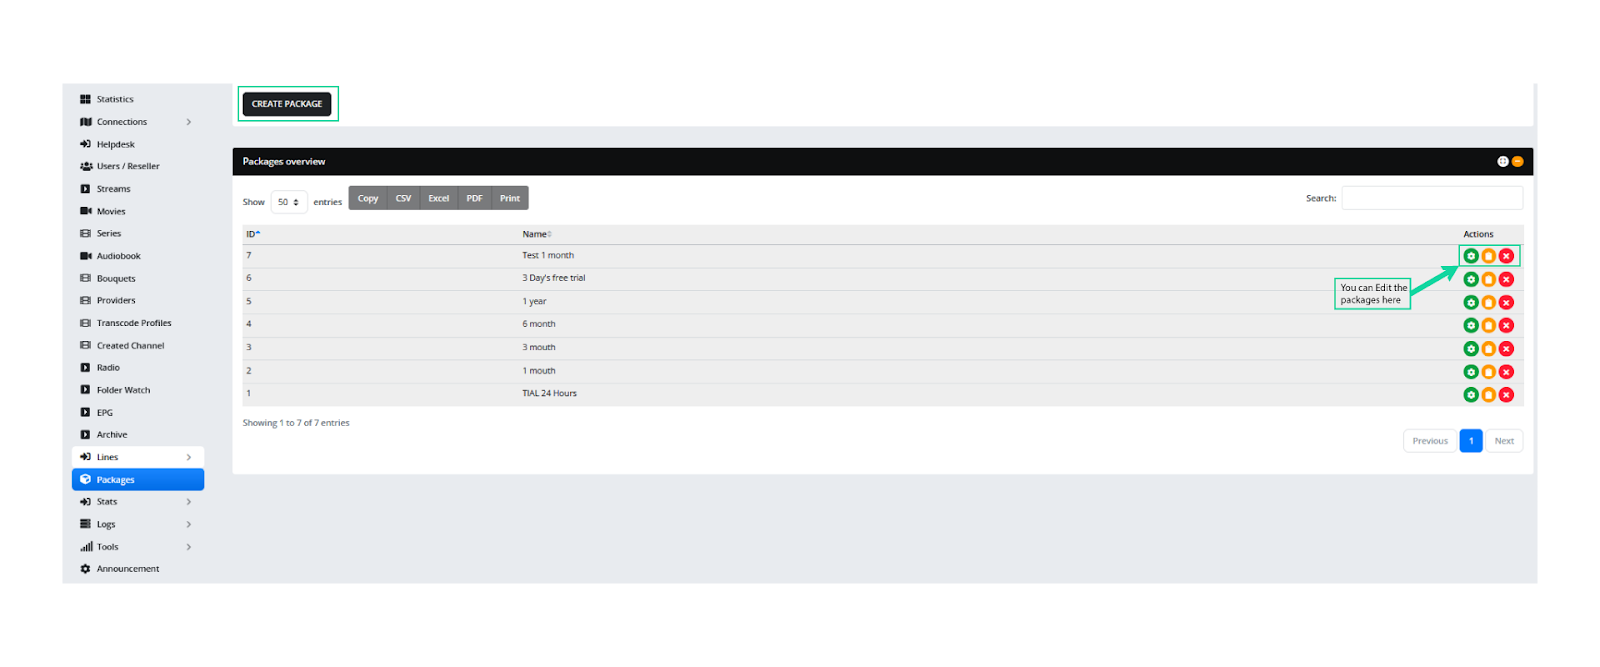
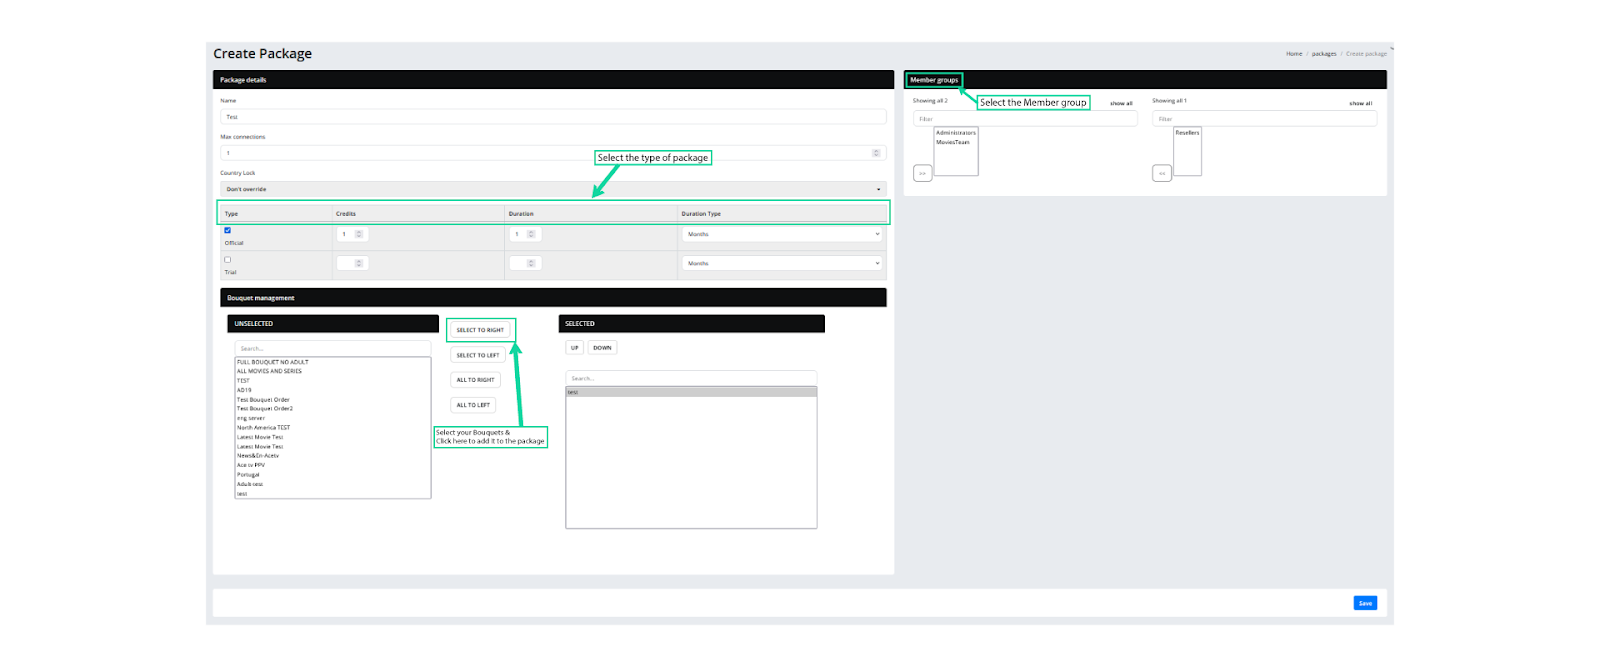
2. Enter a name then select the type of package, for example, we choose the package for 1-month official packages. You need to select how many credits will cost for this package as well. And lastly, select your Bouquets and click on Select to Right. After that, you need to choose the Member groups. Then hit save and your package is good to use.
After creating the package, it’s time to create a new User/Reseller.
Create User/Reseller
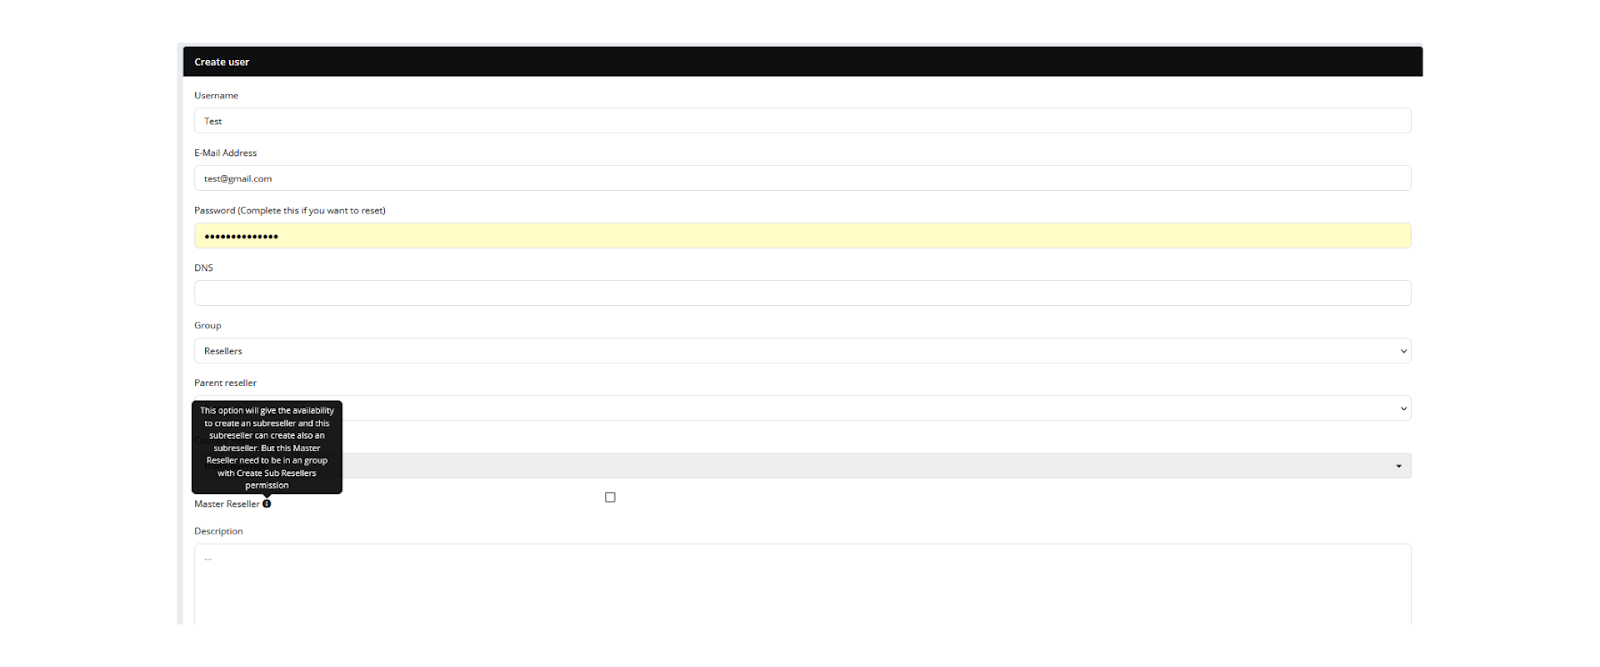
1. Go to the User/Reseller section and click on Create User.
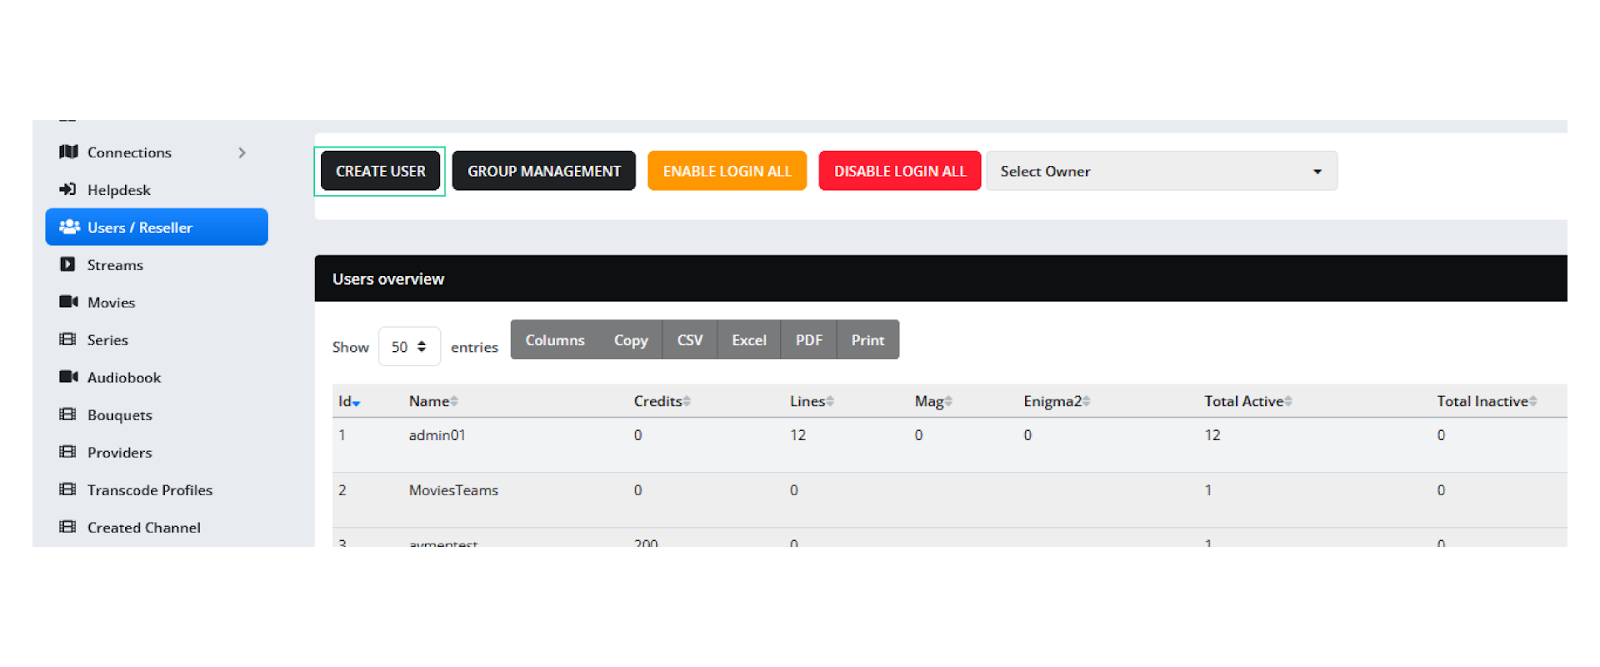
2. Enter your Username and password, email, and DNS (You can get the DNS from the Server Manager > Servers, usually the Main’s DNS is your desired DNS), then select the type of this user, for example, we are creating a Reseller type user. If it’s a Master Reseller, then check the Master Reseller box. (This option will give the availability to create a subreseller and this subreseller can create also a subreseller. But this Master Reseller needs to be in a group with Create Sub Reseller permission). And hit Save from the bottom.
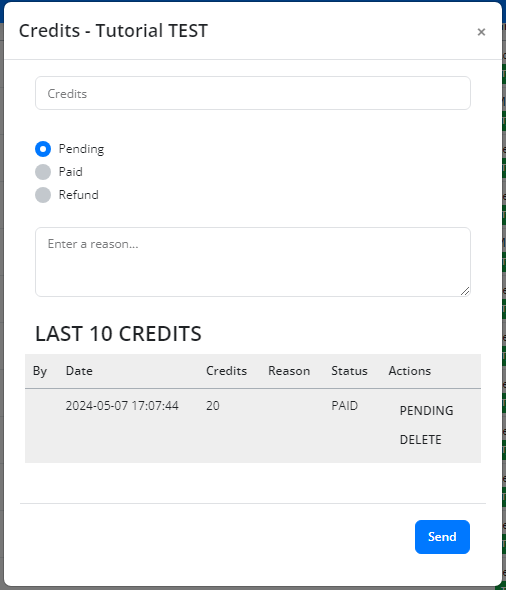
3. Now that the User is created, you need to give this new user credits and Packages.
First, from the Action menu at the right, click on Credits, and this page will pop up. Enter the amount of credits you want this user to have and then hit save.
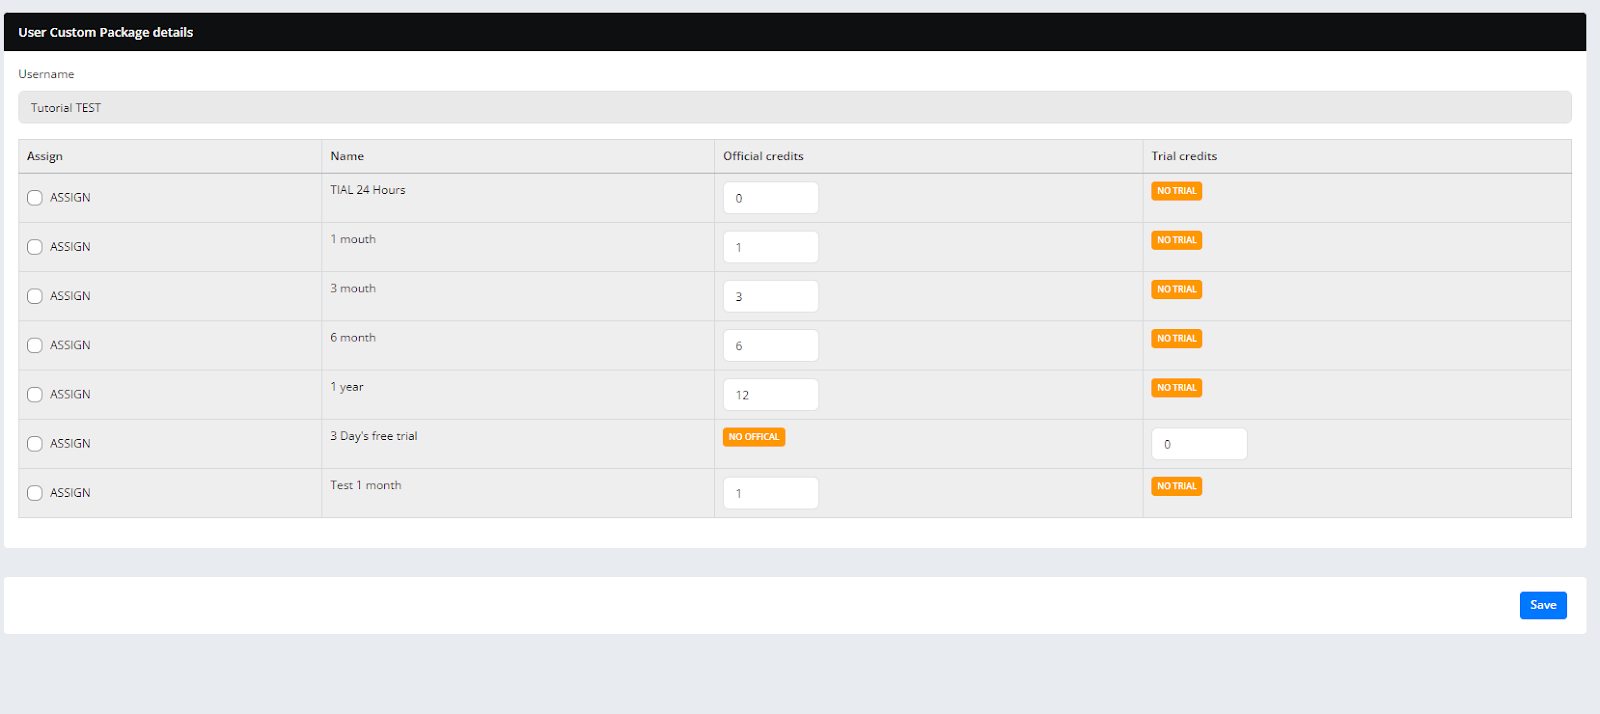
4. Again from the action menu click on packages and select your desired package for this user and click save.
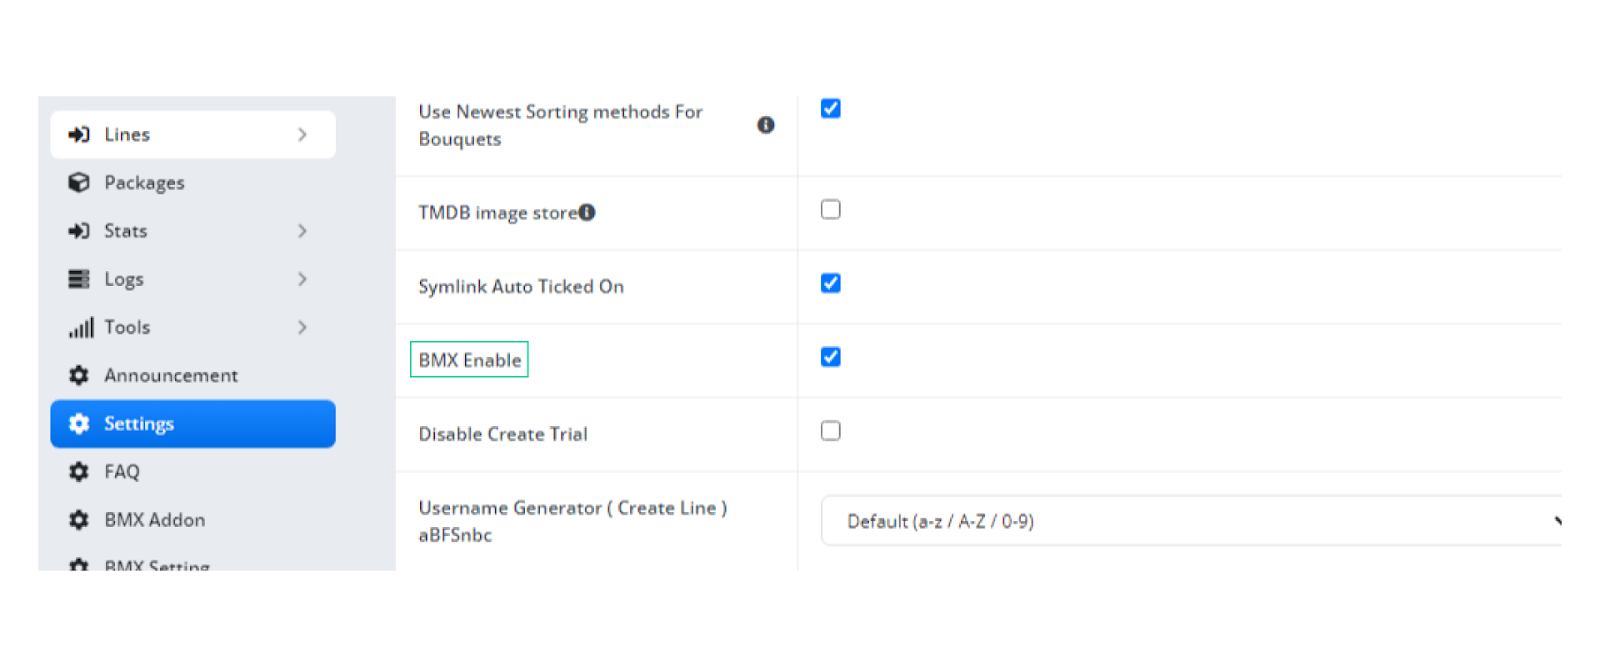
After that, your work on NXT is almost done. Now you only need two things the Platform Token and BMX Private keys. To get these, you need to check the BMX Enable box from the settings.
After doing this, go to the User/Reseller section again and click on the BMX button from the Action menu to retrieve the Platform Token and both Private Keys. Make sure there is no space in between while copying the Platform Token and Keys.
Now that you have the Token and Keys your work on the NXT panel is complete. You will need the Token and Keys for adding connectors on the BMX panel.
Creating Connection on the BMX
1. On the BlueMidX dashboard, navigate to "Connectors" under Media Inputs.
2. Click on "Create new Connector."
3. Enter the required information (Name, Platform Token, Private Keys, and Description).
Note: The token and private key can be received from the provider owner.
4. After creating the connector, you can now go to your profile tab and proceed to add it to your chosen profile.
Note: If you have multiple connectors, then you can switch between both of your connectors to your desired profile.
Connector’s actions:
Here are the details and actions you can use for Connectors, and please ensure you choose the
correct connector before updating or deleting it.
Edit: If you want to configure your connector's setup.
Check Connection: To verify the real-time connection status.
Fetch Provider Configurations: To obtain the latest configuration details from the service
provider's system.
Delete: If you no longer want to use that connector's service.
Connector’s details:
Name: Name of your connector or service provider.
Credits: Count of available credits from your provider.
Credits Updated: Showing the date of the most recent credit usage.
Provider Status: Status of the connection to your connector provided by the service provider.