How to add Add-ons:
To add an Add-on to your BMX panel, you need a BMX Add-on on your NXT panel.
To create a BMX Addon you also need Bouquets, and while creating an add-on, you need to make sure the Bouquets only have one specific type of content, for example, only Live TV Bouquets or only Movies or Series Bouquets.
Create a BMX Add-On
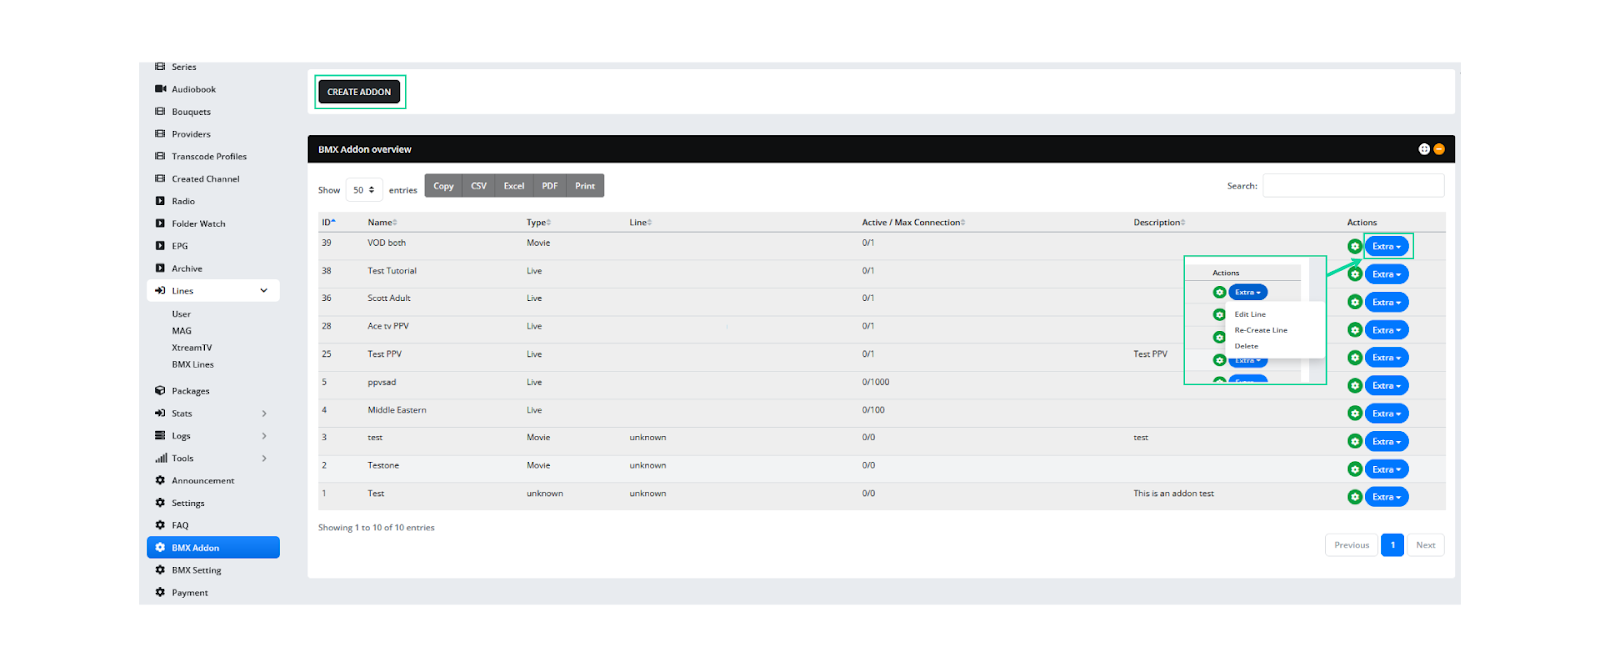
1. Go to the BMX Addon section on your NXT Panel. Then click on Create Addon.
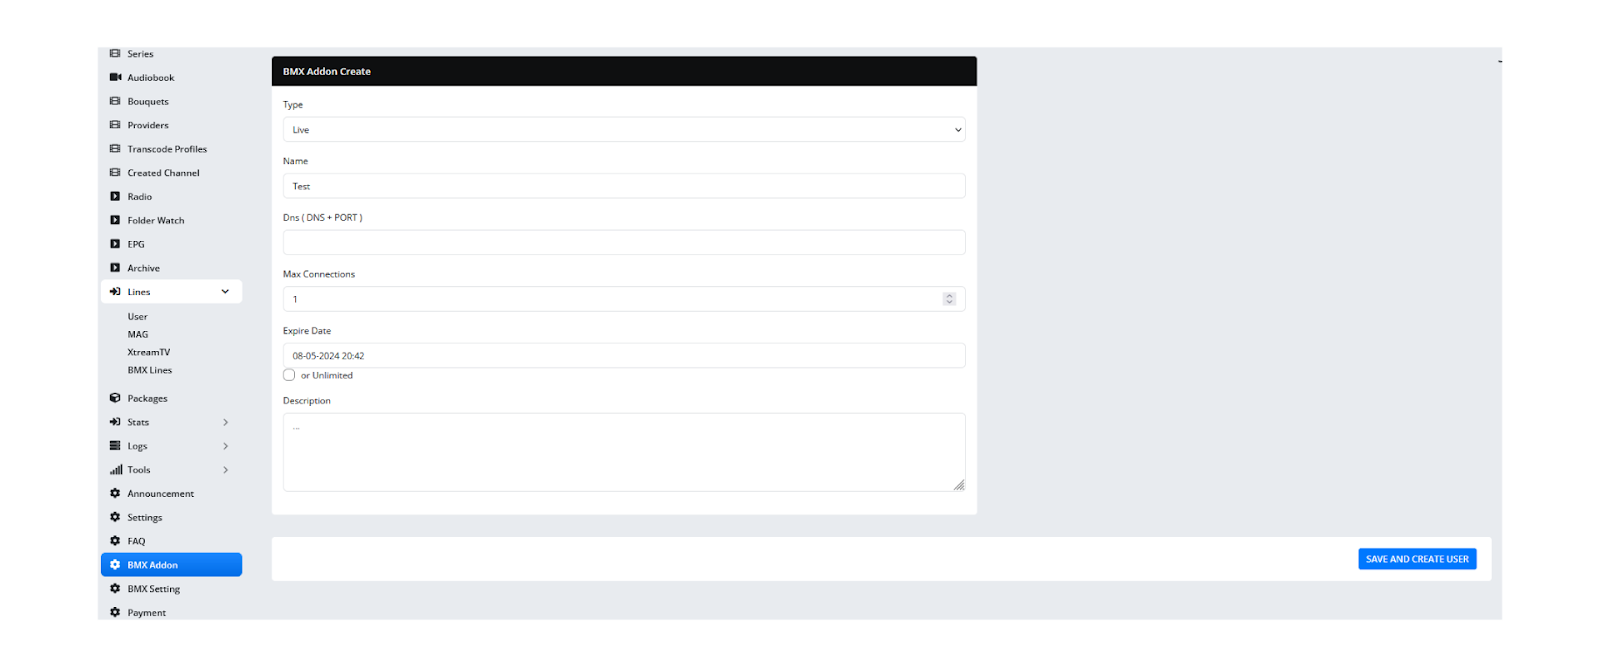
2. Now select the type of addon. If it’s a Live Add-on, choose Live. Select the name of your Add-on, enter the DNS, Max connection is usually 1 because an addon can be used to one particular BMX profile, and lastly, select the expiration date and hit Save and Create User.
3. After clicking on Save and Create User, a new page will pop up, from there you can get Token 1 and Token 2, copy and save them somewhere as you will need them later in BMX. Otherwise, you can always open an Edit addon page and see the tokens. In the case of a Reseller Account, you will not have access to this page. For a reseller, The tokens can be achieved from the Provider.
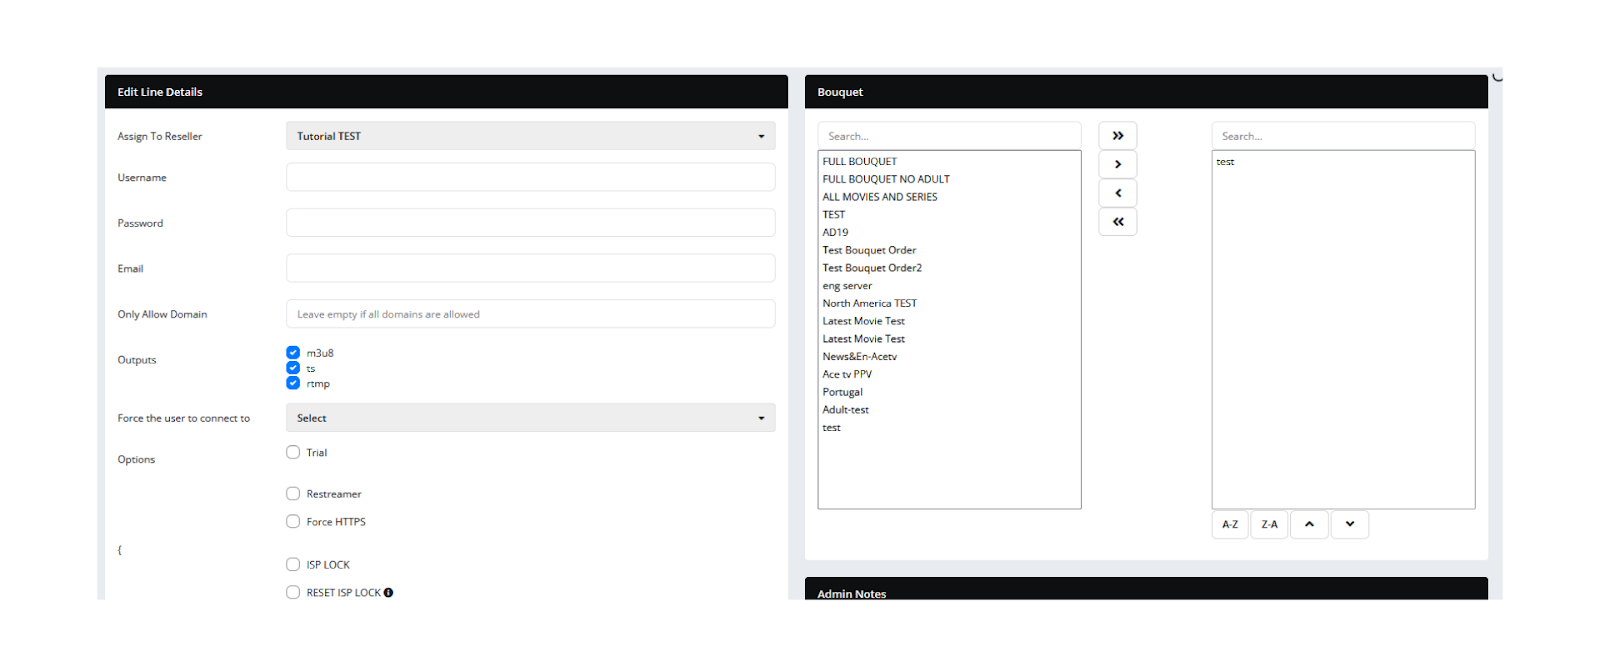
4. Return to the main BMX Addon page and select Extra > Edit Line from the Action menu for the addon you just created. Now just select the Reseller that you want to assign this add-on, and choose your desired bouquets. Then hit Save at the bottom.
Now that you have created an Add-on on your NXT panel, you can just take the tokens for this add-on and use them while creating an Add-on on your BMX account.
Adding Add-on on BMX
1. On the BlueMidX dashboard, under the Media Inputs you can see the "Addons" section.
2. To create a new Add-on, click on "Create."
3. Enter the Name, and select your Platform, after choosing your Platform, you need to add Tokens or Username and Password (based on the type of XC you use. And you can get these tokens or Username and password from your provider), then paste your Add-on's Icon URL, Description and simply click Save to finish creating the Add-on.
Note: If your Add-on is an Adult Add-on, then make sure to ✔ the Adult check box. (Any adult Add-ons will be protected by Parental PIN on the app, the default PIN on the app is - 0000, and you can always change the PIN from the app settings at any point.)
4. After creating the Add-on, you can go to your profile tab and add it to your chosen profile.
Go to the Profile section, then Click on Edit for your desired Profile. Then scroll down and locate the Add-on option at the bottom, and you will be able to see your created Add-on. Lastly, Click Save to successfully add the Add-on to you profile.
Add-on Details
Name: Name of your Add-On’s service provider.
Type: Live, Movies, Series or Radio.
Platform: Displaying the platform used by Add-On's service provider.
Connections: Indicates the available connections.
Actions: Allows you to Edit your Add-ons, Check the Add-on's connection, or option to delete the Add-on (You can only delete an Add-on, if it's not added to any of your profiles).